Sa ating digital age, ang high-speed internet at maaasahang mga network ng komunikasyon ay pinapagana ng mga fiber optic cable, na nagpapadala ng data bilang mga light signal sa hindi kapani-paniwalang bilis. Gayunpaman, ang pagganap ng teknolohiya ng fiber optic depende masyado sa proper pag-install ng fiber optic cable. Mag-uugnay man ito sa mga lungsod, gusali, o kahit na mga kontinente, pag-install mga fiber optic cable nangangailangan ng maingat na pagpaplano at pagpapatupad upang matiyak ang pinakamainam na pagganap at tibay. Iba't ibang kapaligiran ang hinihingi ng iba pag-install ng fiber optic cable mga pamamaraan: mga kableng panghimpapawid na nakasabit sa mga poste, mga kableng direktang nakabaon sa ilalim ng lupa, mga kableng nasa ilalim ng tubig na inilatag sa ilalim ng tubig, at mga kableng panloob o panlabas na ginagamit sa mga partikular na setting. Ang gabay na ito para sa baguhan ay gagabay sa iyo sa hakbang-hakbang na proseso ng pag-install ng fiber optic cable para sa bawat pamamaraan, na nagha-highlight ng mga pinakamahuhusay na kagawian, tool, at pagsasaalang-alang. Kung ikaw man ay isang technician, isang network planner, o simpleng curious teknolohiya ng fiber optic, tutulungan ka ng artikulong ito na maunawaan kung paano mag-install mga fiber optic cable mabisa. Magsimula tayo sa komprehensibong gabay na ito sa pag-install ng fiber optic cable!
Pag-unawa sa Pag-install ng Fiber Optic Cable
Pag-install ng fiber optic cable ay ang proseso ng pag-deploy mga fiber optic cable upang lumikha ng isang network para sa pagpapadala ng data bilang mga light signal. Sa teknolohiya ng fiber optic, ang mga cable na ito ay binubuo ng mga glass o plastic fibers na nagdadala ng mga light pulse, na nag-aalok ng mataas na bandwidth, mababang latency, at immunity sa electromagnetic interference. Ang pag-install ng fiber optic cable Kasama sa proseso ang pagpaplano ng ruta, paghahanda sa kapaligiran, paglalagay ng cable, pagkonekta nito sa kagamitan, at pagsubok sa network. Iba't ibang paraan ng pag-install ng fiber optic cable—gaya ng aerial, direct-buried, submarine, indoor, at outdoor—nangangailangan ng mga iniangkop na diskarte upang isaalang-alang ang mga salik sa kapaligiran, mga uri ng optical cable, at mga kinakailangan sa pagganap, na tinitiyak ang mga fiber optic cable gumana nang mapagkakatiwalaan sa malalayong distansya.
Bakit Mahalaga ang Wastong Pag-install sa Fiber Optic Technology
Tama pag-install ng fiber optic cable ay kritikal sa pagganap at mahabang buhay ng isang network. Sa teknolohiya ng fiber optic, kahit na maliliit na error—tulad ng labis baluktot, hindi wastong pag-splice, o pagkakalantad sa moisture—ay maaaring magpababa sa kalidad ng signal, na humahantong sa pagkawala ng data o downtime ng network. Halimbawa, isang hindi wastong pagkaka-install na aerial fiber optic cable maaaring lumubog at masira sa malakas na hangin, habang ang isang hindi magandang nabaon na cable ay maaaring masira sa pamamagitan ng paghuhukay. Ang bawat isa pag-install ng fiber optic cable Ang pamamaraan ay tumutugon sa mga partikular na hamon, tulad ng pagprotekta sa mga kable sa ilalim ng tubig mula sa presyon ng tubig o pagtiyak na ang mga panloob na kable ay nakakatugon sa mga pamantayan sa kaligtasan ng sunog. Sa pamamagitan ng pagsunod sa pinakamahuhusay na kagawian sa pag-install ng fiber optic cable, matitiyak ng mga technician ang maaasahan, mataas na bilis ng komunikasyon para sa mga darating na taon.
Mga Tool at Pag-iingat sa Kaligtasan para sa Pag-install ng Fiber Optic Cable
Bago simulan ang anuman pag-install ng fiber optic cable, kailangan ng mga technician ang mga tamang tool at mga hakbang sa kaligtasan. Kasama sa mahahalagang tool ang mga cable cutter, strippers, cleaver, fusion splicer, optical time-domain reflectometer (OTDRs) para sa pagsubok, at protective gear tulad ng gloves at safety glasses. Sa teknolohiya ng fiber optic, nagtatrabaho kasama mga fiber optic cable nagsasangkot ng paghawak ng mga glass fiber, na maaaring maputol at magdulot ng pinsala, kaya ang mga pag-iingat sa kaligtasan ay mahalaga. Dapat ding sundin ng mga technician ang mga lokal na regulasyon, tulad ng pagkuha ng mga permit para sa paghuhukay sa direktang inilibing pag-install ng fiber optic cable o pagtiyak na ang mga aerial installation ay nakakatugon sa mga kinakailangan sa taas. Ang wastong paghahanda ay nagsisiguro ng maayos at ligtas pag-install ng fiber optic cable proseso, anuman ang paraan na ginamit.
Step-by-Step na Gabay sa Mga Paraan ng Pag-install ng Fiber Optic Cable
Pag-install ng Aerial Fiber Optic Cable
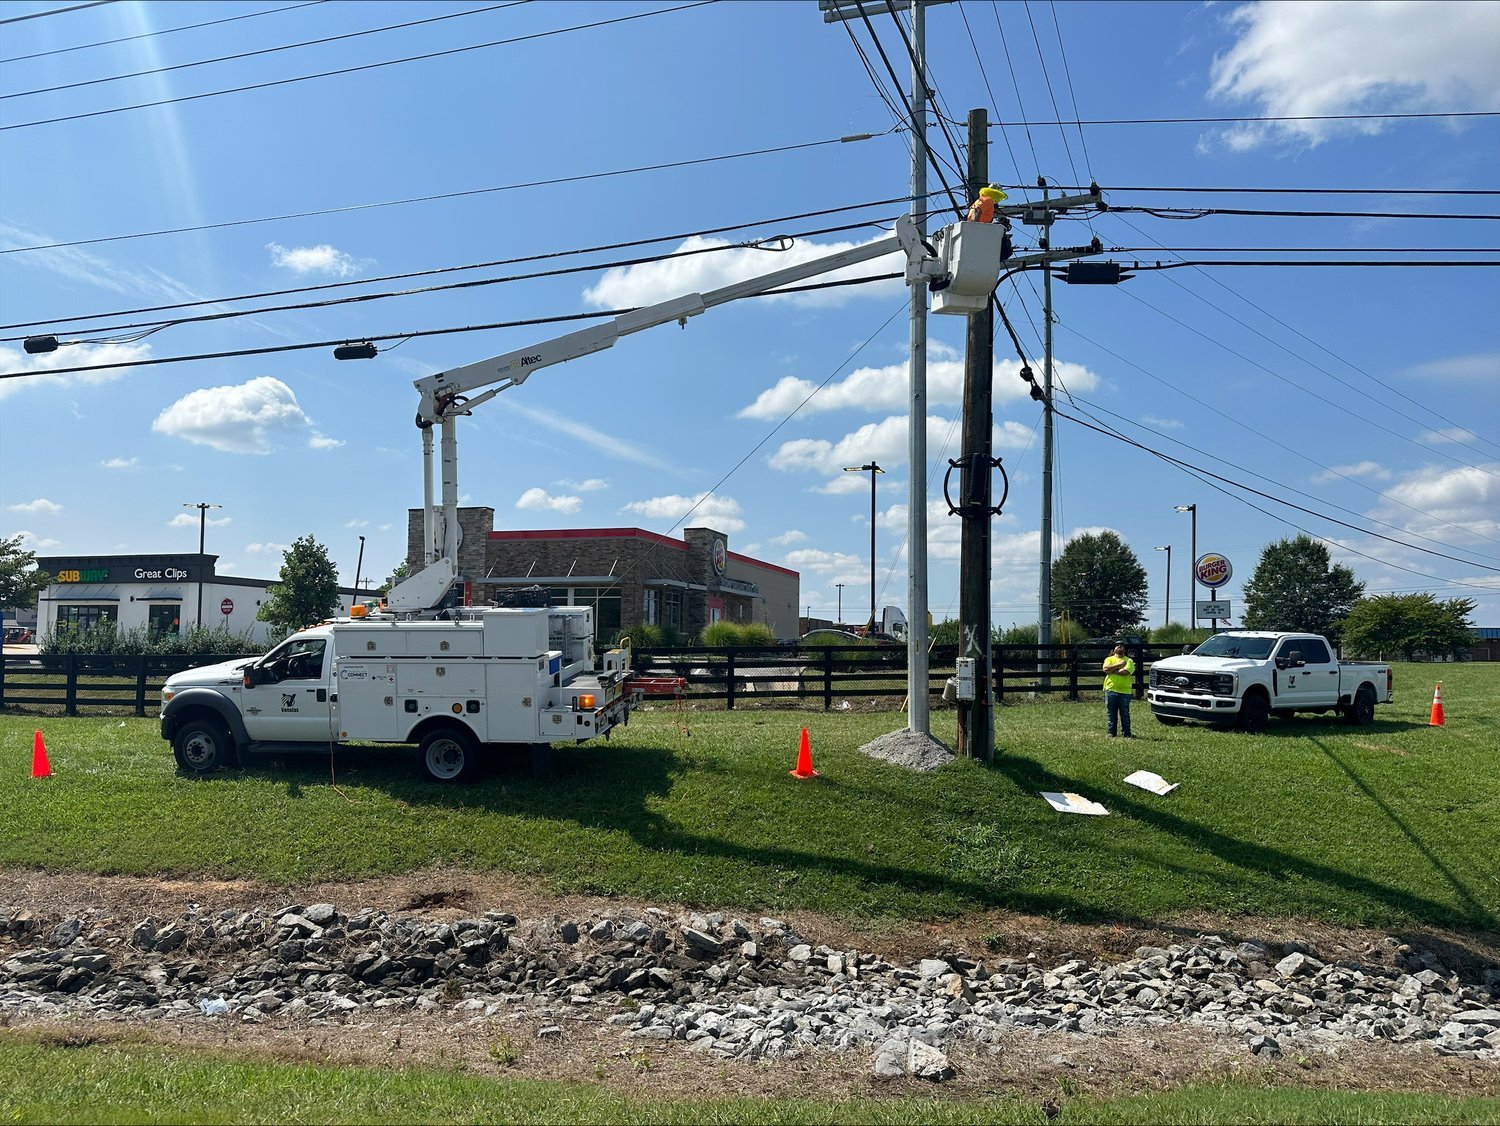
panghimpapawid pag-install ng fiber optic cable nagsasangkot ng pagsususpinde mga fiber optic cable sa mga poste o tore, na karaniwang ginagamit sa mga urban at rural na lugar para sa mga network ng telekomunikasyon. Narito ang isang step-by-step na gabay:
- Pagpaplano at Pagsusuri: I-map ang ruta, pagkilala sa mga kasalukuyang poste ng utility o pagpaplano ng mga bago. Suriin kung may mga hadlang tulad ng mga puno o linya ng kuryente, at kumuha ng mga kinakailangang permit para sa pag-install ng fiber optic cable.
- Paghahanda ng poste: Tiyaking maayos ang pagkakaayos ng mga poste at naaangkop ang pagitan (karaniwang 30–50 metro ang pagitan). Mag-install ng hardware tulad ng mga bracket o clamp para suportahan ang fiber optic cable.
- Paghahanda ng Cable: Pumili ng aerial fiber optic cable na may dyaket na lumalaban sa panahon at mga miyembro ng lakas na makatiis sa hangin at yelo. Maingat na i-unroll ang cable upang maiwasan ang mga kink o pinsala.
- Pag-string ng Cable: Gumamit ng mekanismo ng paghila, tulad ng winch, upang itali ang fiber optic cable sa pagitan ng mga poste. Ikabit ang cable sa mga clamp, tinitiyak ang wastong pag-igting upang maiwasan ang sagging ngunit maiwasan ang sobrang paghigpit, na maaaring ma-stress ang fiber optic cable.
- Splicing at Pagwawakas: Sa mga itinalagang punto, idugtong ang fiber optic cable upang ikonekta ang mga seksyon o wakasan ito sa isang junction box. Gumamit ng fusion splicing para sa mababang signal loss in teknolohiya ng fiber optic.
- Pagsubok: Subukan ang koneksyon gamit ang isang OTDR upang tingnan kung may pagkawala o mga pagkakamali ng signal. Tiyakin ang pag-install ng fiber optic cable nakakatugon sa mga pamantayan sa pagganap.
- Pag-secure at Pagpapanatili: I-secure ang fiber optic cable na may wastong paghagupit upang maiwasan ang paggalaw, at mag-iskedyul ng mga regular na inspeksyon upang matugunan ang pagsusuot mula sa mga kondisyon ng panahon.
panghimpapawid pag-install ng fiber optic cable ay cost-effective para sa malalaking lugar ngunit nangangailangan ng patuloy na pagpapanatili upang maprotektahan ang mga fiber optic cable mula sa mga salik sa kapaligiran.
Direct-Buried Fiber Optic Cable Installation
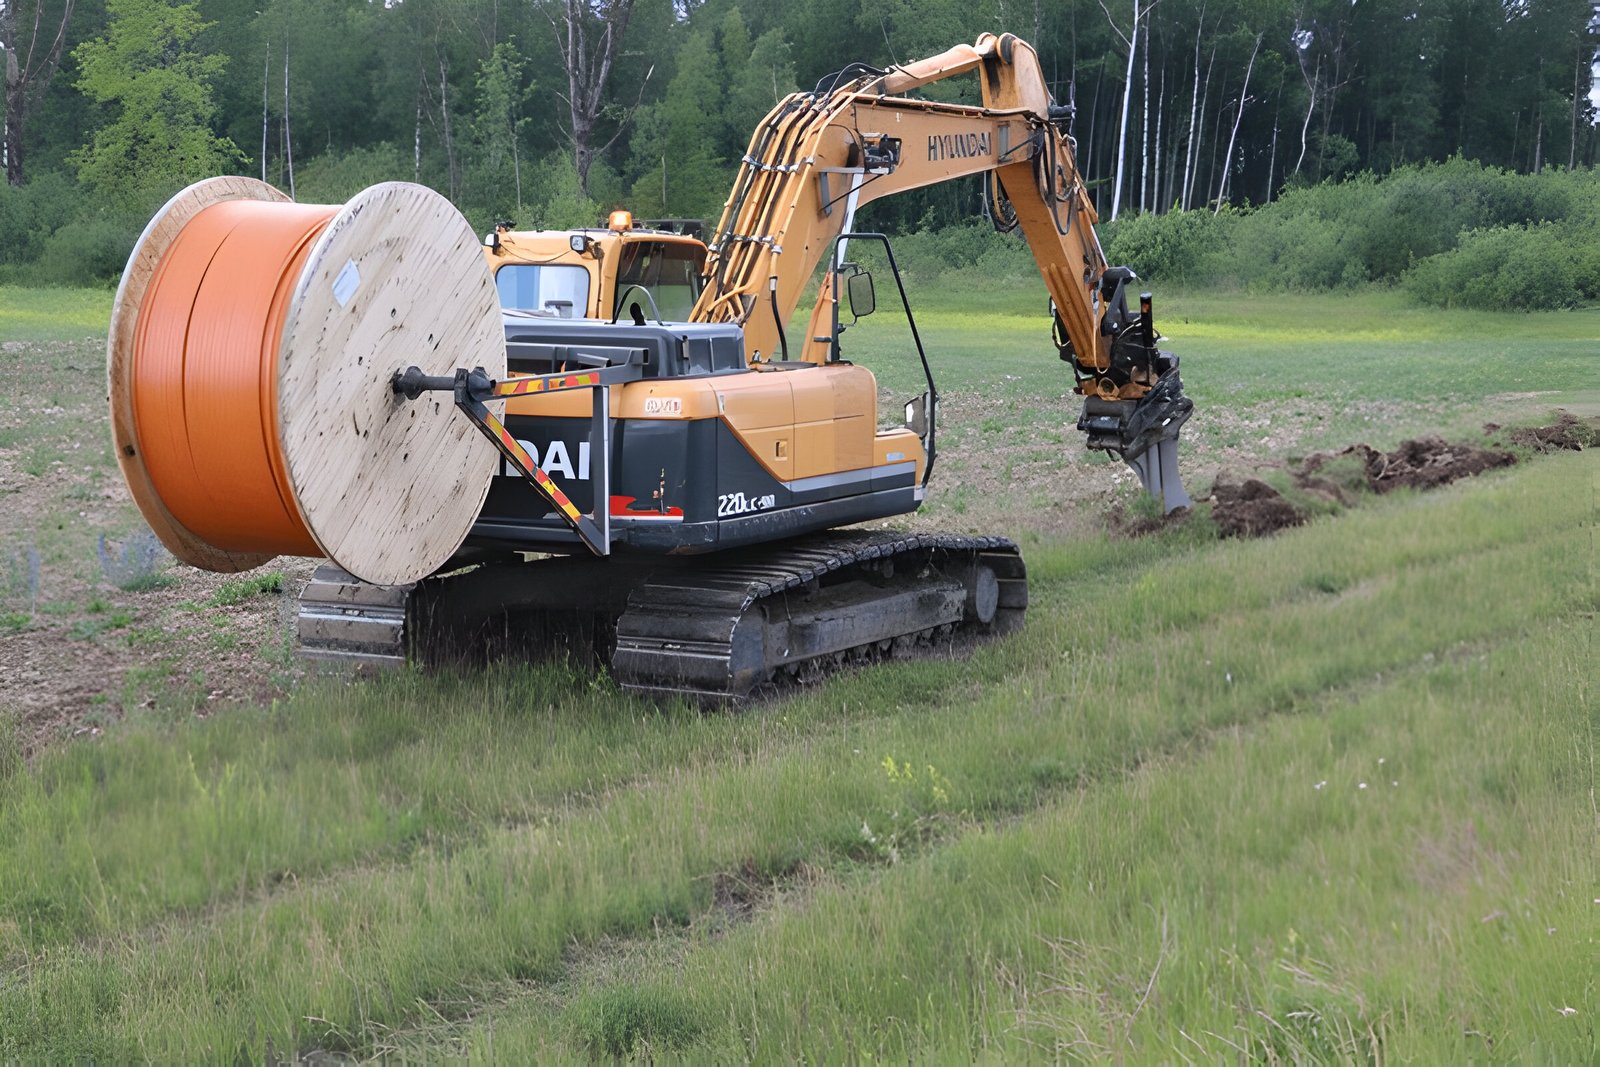
Direktang inilibing pag-install ng fiber optic cable nagsasangkot ng paglalagay mga fiber optic cable direkta sa lupa na walang conduit, kadalasang ginagamit para sa malayuang rural network. Narito ang proseso:
- Pagpaplano ng Ruta: Suriin ang landas ng pag-install, pag-iwas sa mga hadlang tulad ng mga bato o umiiral na mga kagamitan. Kumuha ng mga permit para sa paghuhukay at markahan ang mga kagamitan sa ilalim ng lupa upang maiwasan ang pinsala habang pag-install ng fiber optic cable.
- Trenching: Maghukay ng trench, karaniwang 0.6–1.2 metro ang lalim, depende sa mga lokal na regulasyon at kondisyon ng lupa. Siguraduhin na ang trench ay sapat na lapad upang mapaunlakan ang fiber optic cable (mga 15–30 cm).
- Paghahanda ng Cable: Pumili ng direktang inilibing fiber optic cable na may masungit, moisture-resistant na jacket. Ilagay ang cable nang patag upang maiwasan ang pag-twist o pagbaluktot na lampas sa pinakamababang radius ng bend nito.
- Paglalagay ng Cable: Ilagay ang fiber optic cable sa trench, pagdaragdag ng isang layer ng buhangin o graba sa ibaba at sa itaas upang maprotektahan ito mula sa matutulis na bagay. Gumamit ng warning tape sa itaas ng cable para alertuhan ang mga hinaharap na digger.
- Backfilling: Punan ang trench ng lupa, siksikin ito upang maiwasan ang pag-aayos. Iwasan ang malalaking bato na maaaring makapinsala sa fiber optic cable sa paglipas ng panahon.
- Splicing at Pagwawakas: Pagdugtong ang fiber optic cable sa mga punto ng koneksyon o wakasan ito sa mga access point tulad ng mga manhole, gamit ang mga pagsasara ng proteksiyon na splice upang maprotektahan laban sa kahalumigmigan.
- Pagsubok at Dokumentasyon: Subukan ang pag-install ng fiber optic cable na may OTDR para i-verify ang integridad ng signal. Idokumento ang ruta para sa sanggunian sa hinaharap, tandaan ang lalim at lokasyon ng mga fiber optic cable.
Direktang inilibing pag-install ng fiber optic cable ay matibay ngunit nangangailangan ng maingat na pagpaplano upang maprotektahan ang mga fiber optic cable mula sa paggalaw ng lupa o hindi sinasadyang paghuhukay.
Pag-install ng Submarine Fiber Optic Cable

Submarino pag-install ng fiber optic cable ay ginagamit sa pagtula mga fiber optic cable sa mga karagatan o lawa, na nag-uugnay sa mga kontinente para sa pandaigdigang komunikasyon. Narito kung paano ito ginagawa:
- Pagpaplano ng Ruta: I-map ang ruta sa ilalim ng dagat, pag-iwas sa mga panganib tulad ng mga pagkawasak ng barko, mga bulkan sa ilalim ng dagat, o mga lugar ng pangingisda. Magsagawa ng mga survey sa ilalim ng dagat upang masuri ang lalim at lupain para sa pag-install ng fiber optic cable.
- Pagpili ng Cable: Gumamit ng submarino fiber optic cable na may maraming proteksiyon na layer, kabilang ang steel armor at waterproof jacket, upang mapaglabanan ang presyon ng tubig, agos, at aktibidad ng dagat.
- Paghahanda sa Paglalagay ng Cable: I-load ang fiber optic cable papunta sa isang dalubhasang cable-laying ship na nilagyan ng araro o remotely operated vehicle (ROV) upang gabayan ang cable patungo sa seabed.
- Paglalagay ng Cable: Ibaba ang fiber optic cable sa seabed, gamit ang araro upang ibaon ito sa mababaw na tubig (hanggang 1000 metro) upang maprotektahan ito mula sa mga anchor o kagamitan sa pangingisda. Sa mas malalim na tubig, ang cable ay maaaring nasa sahig ng karagatan.
- Splicing at Koneksyon: Sa mga landing point sa baybayin, dugtungan ang submarino fiber optic cable sa mga terrestrial cable, gamit ang watertight splice box upang maiwasan ang kaagnasan teknolohiya ng fiber optic.
- Pagsubok: Subukan ang kabuuan pag-install ng fiber optic cable para sa pagpapatuloy at pagkawala ng signal, tinitiyak na gumagana ang cable sa malalayong distansya sa karagatan.
- Pagsubaybay at Pagpapanatili: I-deploy ang mga sensor upang subaybayan ang fiber optic cable para sa pinsala mula sa mga natural na kaganapan tulad ng lindol. Gumamit ng mga repair ship upang ayusin ang mga fault, na maaaring may kinalaman sa pagkuha at pag-splice ng mga fiber optic cable.
Submarino pag-install ng fiber optic cable ay kumplikado at magastos ngunit mahalaga para sa pandaigdigang koneksyon sa internet, na nangangailangan ng espesyal na kagamitan at kadalubhasaan.
Indoor Fiber Optic Cable Installation
panloob pag-install ng fiber optic cable ay ginagamit sa loob ng mga gusali, gaya ng mga opisina o data center, para ikonekta ang mga device o kwarto. Narito ang hakbang-hakbang na proseso:
- Pagpaplano ng Ruta: I-mapa ang cable path sa loob ng gusali, gamit ang mga kasalukuyang cable tray, conduit, o ceiling space. Tiyakin ang pagsunod sa mga code sa kaligtasan ng sunog para sa pag-install ng fiber optic cable.
- Pagpili ng Cable: Pumili ng panloob fiber optic cable na may flame-retardant jacket, tulad ng plenum-rated cable para sa mga air-handling space, upang matugunan ang mga pamantayan sa kaligtasan sa teknolohiya ng fiber optic.
- Pagruruta ng Cable: Patakbuhin ang fiber optic cable sa pamamagitan ng mga conduit o tray, pag-iwas sa matalim na baluktot na lumampas sa minimum bend radius ng cable (karaniwang 10 beses ang diameter ng cable). I-secure ang cable gamit ang mga tali o clip.
- Splicing at Pagwawakas: Wakasan ang fiber optic cable sa mga patch panel o equipment racks, gamit ang mga connector gaya ng SC o LC. I-splice ang mga cable kung kinakailangan, tinitiyak ang kaunting pagkawala ng signal.
- Pagsubok: Gumamit ng OTDR o light source at power meter para subukan ang pag-install ng fiber optic cable, sinusuri ang pagkawala ng signal o mga pagkakamali sa koneksyon.
- Pag-label at Dokumentasyon: Lagyan ng label ang fiber optic cable sa magkabilang dulo para sa madaling pagkilala, at idokumento ang layout ng pag-install para sa pagpapanatili sa hinaharap.
- Mga Panghuling Pagsasaayos: Suriin ang setup upang matiyak ang mga fiber optic cable ay ligtas na itinatali at pinoprotektahan mula sa pisikal na pinsala sa loob ng panloob na kapaligiran.
panloob pag-install ng fiber optic cable inuuna ang kaligtasan at accessibility, tinitiyak ang mga fiber optic cable sumusuporta sa mga high-speed network sa loob ng isang gusali.
Panlabas na Fiber Optic Cable Installation
Panlabas pag-install ng fiber optic cable nag-uugnay sa mga gusali o pasilidad sa mas malalaking lugar, kadalasan sa urban o suburban na mga setting, gamit ang mga pamamaraan tulad ng ducting. Narito ang proseso:
- Pagpaplano ng Ruta: Planuhin ang panlabas na ruta, pagkilala sa mga kasalukuyang duct o pagpaplano ng mga bago. Suriin ang mga salik sa kapaligiran tulad ng trapiko o panahon na maaaring makaapekto pag-install ng fiber optic cable.
- Paghahanda ng Duct: Mag-install o gumamit ng mga kasalukuyang underground duct, karaniwang gawa sa PVC o HDPE, upang protektahan ang fiber optic cable. Siguraduhing malinis at walang dumi ang mga duct.
- Pagpili ng Cable: Pumili ng panlabas fiber optic cable na may UV-resistant, waterproof jacket para makatiis sa mga kondisyon ng panahon, gaya ng mga pagbabago sa temperatura o ulan, in teknolohiya ng fiber optic.
- Cable pulling o blowing: Gumamit ng pulling rope o air-blowing technique para pakainin ang fiber optic cable sa pamamagitan ng duct, tinitiyak na ang cable ay hindi nakaunat o nakabaluktot nang labis.
- Splicing at Pagwawakas: Pagdugtong ang fiber optic cable sa mga manhole o junction box, at tapusin ito sa mga panlabas na cabinet o gusali, gamit ang mga enclosure na hindi tinatablan ng panahon.
- Pagsubok: Subukan ang pag-install ng fiber optic cable na may OTDR upang i-verify ang kalidad ng signal, pagtugon sa anumang mga isyu tulad ng pagkawala o pagkasira ng signal.
- Pagtatak at Proteksyon: Seal duct entry at splice point upang maiwasan ang pagpasok ng tubig, at gumamit ng mga rodent-resistant na materyales upang protektahan ang mga fiber optic cable mula sa pinsala sa kapaligiran.
Panlabas pag-install ng fiber optic cable Tinitiyak ang tibay sa malupit na mga kondisyon, na nagbibigay ng maaasahang koneksyon sa mas malalaking lugar.
Mga Benepisyo ng Wastong Pag-install ng Fiber Optic Cable
Maaasahang High-Speed Connectivity
Tama pag-install ng fiber optic cable Tinitiyak ang maaasahan at mataas na bilis ng pagkakakonekta sa lahat ng mga pamamaraan. Sa teknolohiya ng fiber optic, wastong naka-install mga fiber optic cable bawasan ang pagkawala ng signal, na naghahatid ng pare-parehong performance para sa mga application tulad ng internet access, video streaming, at paglipat ng data, sa pamamagitan man ng aerial, direct-buried, submarine, indoor, o outdoor installation.
Pangmatagalang Katatagan at Mababang Pagpapanatili
Isang mahusay na naisakatuparan pag-install ng fiber optic cable pinahuhusay ang tibay ng mga fiber optic cable, binabawasan ang pangangailangan para sa madalas na pagpapanatili. Halimbawa, isang maayos na ibinaon na submarino fiber optic cable maaaring tumagal ng mga dekada na may kaunting pag-aayos, habang ang isang panloob na cable na naka-install na nasa isip ang kaligtasan sa sunog ay umiiwas sa mga magastos na pagpapalit, na tinitiyak ang pangmatagalang pagiging maaasahan sa teknolohiya ng fiber optic.
Scalability para sa Hinaharap na Pangangailangan
Tama pag-install ng fiber optic cable nagbibigay-daan para sa scalability, na nagbibigay-daan sa mga network na pangasiwaan ang mga pangangailangan sa hinaharap. Sa teknolohiya ng fiber optic, pag-install ng dagdag na kapasidad (hal., dark fiber) habang pag-install ng fiber optic cable tinitiyak na masusuportahan ng network ang tumaas na trapiko ng data, na ginagawa itong isang solusyon sa hinaharap na patunay para sa lumalaking pangangailangan ng koneksyon sa lahat ng paraan ng pag-install.
Mga Hamon sa Pag-install ng Fiber Optic Cable
Mga Hamon sa Kapaligiran at Terrain
Ang bawat isa pag-install ng fiber optic cable Ang pamamaraan ay nahaharap sa mga natatanging hamon sa kapaligiran. panghimpapawid mga fiber optic cable ay nakalantad sa hangin at yelo, ang mga direktang nakabaon na kable ay nakaharap sa pagbabago ng lupa, ang mga kable sa ilalim ng tubig ay humaharap sa presyon ng tubig, at ang mga panlabas na kable ay dapat makatiis sa matinding panahon. Sa teknolohiya ng fiber optic, ang maingat na pagpaplano at matatag na disenyo ng cable ay mahalaga upang malampasan ang mga hamong ito sa panahon pag-install ng fiber optic cable.
Mataas na Paunang Gastos at Dalubhasa
Pag-install ng fiber optic cable maaaring magastos at nangangailangan ng espesyal na kadalubhasaan. Submarino pag-install ng fiber optic cable, halimbawa, ay nagsasangkot ng mga mamahaling barko at kagamitan, habang ang mga panloob na instalasyon ay nangangailangan ng kaalaman sa mga fire code. Sa teknolohiya ng fiber optic, ang pangangailangan para sa mga bihasang technician at mga advanced na tool ay maaaring gawin pag-install ng fiber optic cable isang makabuluhang pamumuhunan, kahit na ang mga pangmatagalang benepisyo ay kadalasang mas malaki kaysa sa mga gastos.
Panganib ng Pinsala sa Pag-install
Ang panganib ng pagkasira mga fiber optic cable habang pag-install ng fiber optic cable ay isang karaniwang hamon. Sa teknolohiya ng fiber optic, ang sobrang baluktot, hindi wastong pag-splicing, o pagkakalantad sa moisture ay maaaring makapinsala sa fiber optic cablepagganap ni. Ang bawat paraan—hanggap man, direktang ibinaon, submarino, panloob, o panlabas—ay nangangailangan ng maingat na paghawak upang maiwasan ang pinsala, na tinitiyak ang tagumpay ng pag-install ng fiber optic cable.
Konklusyon: Mastering Fiber Optic Cable Installation
Pag-install ng fiber optic cable ay isang kritikal na proseso na nagpapagana sa ating konektadong mundo, na nagpapagana ng mataas na bilis, maaasahang komunikasyon sa pamamagitan ng teknolohiya ng fiber optic. Kung ito ay panghimpapawid mga fiber optic cable nakasabit sa mga poste, direktang nakabaon na mga cable na inilagay sa ilalim ng lupa, mga submarine cable na tumatawid sa karagatan, o panloob at panlabas na mga kable na nagdudugtong sa mga gusali, bawat isa pag-install ng fiber optic cable Ang pamamaraan ay nangangailangan ng isang iniangkop na diskarte upang matiyak ang tagumpay. Sa pamamagitan ng pagsunod sa sunud-sunod na mga gabay na nakabalangkas sa itaas, makakamit ng mga technician ang maaasahan, matibay, at nasusukat na mga network na nakakatugon sa mga modernong pangangailangan. Bagama't umiiral ang mga hamon tulad ng mga salik sa kapaligiran, gastos, at panganib ng pinsala, ang mga benepisyo ng wasto pag-install ng fiber optic cable—gaya ng high-speed connectivity at pangmatagalang pagiging maaasahan—gawin itong isang kapaki-pakinabang na pamumuhunan. Bilang teknolohiya ng fiber optic patuloy na umuunlad, nagdaraos pag-install ng fiber optic cable ay mananatiling susi sa pagbuo ng mga network ng hinaharap, na tinitiyak iyon mga fiber optic cable panatilihin kaming konektado, anuman ang kapaligiran.
